There are dozens of blogging tools for beginners out there, but which ones are worthy of your time? I've carefully created this list of only the best tools and resources that I would recommend to a friend starting a blog. I'll cover everything from setting up your blog correctly to capturing high-quality photos on a budget!

Starting a blog can seem like an overwhelming task at first, and if you’re thinking about blogging as a job, that thought can be downright terrifying.
It's been an exciting journey turning my blogging hobby into a new career, but that didn't happen overnight. It took time and research to test every blogging tool out there that I could afford.
The following list includes the blogging tools and resources I use to run my blogs. Some are affiliate links and some are FREE resources, but ALL of them are tools I either currently use or have used and loved.
Many of these tools provided me with new ways to grow my audience, traffic, and revenue over time.
Feel free to jump ahead to the blogging tools that apply to you by clicking the links below.
Jump to:
💻 WordPress + Setting up your Blog
For my money, WordPress is always your best bet if you’re trying to build a sustainable income from your site. It is the best-known and most versatile blogging platform (please don't confuse it with WordPress.com--that's a self-hosted version of the platform with lots of limitations).
You can learn more about how to use self-hosted WordPress in this detailed free WordPress course by iMark Interactive.
5 Steps to Set Up Your Blog Correctly
Be careful not to make the same mistakes I did when setting up your blog! In the early days of my first blog, I tried and canceled three unhelpful hosting companies and completely redesigned my site twice.
Let me save you some time and explain all the steps to set up a WordPress blog.
1. Purchase your domain name
I recommend keeping your purchased domain name (your website's URL like my "amycakesbakes.com") separate from your hosting provider-that way if you switch hosting providers, you don't have to go through the hassle of changing your domain name's location, too.
Instead, you control your domain's nameservers and point them toward your current hosting provider.
I have all my domain names through GoDaddy. When you buy your domain name, it's also a good idea to save all of your social media handles. (Whether you want to get into social media or not, you may want these reserved down the road!)
2. Choose a Hosting Provider
A website host is basically where you "rent " your space on the web. No matter what hosting provider you choose, I highly recommend choosing one that provides managed WordPress hosting.
Managed WordPress hosting means the hosting platform will already have WordPress installed and be configured to work seamlessly with WordPress. Maintaining your blog will be much easier this way.
Hosting for a brand-new blog or to learn how to use WordPress
I started with Namecheap Easy WP on my second blog because it's incredibly affordable. "Shared" hosting like Namecheap is cheap, but its speed is not as reliable as dedicated hosting because you are sharing the webspace with other websites.
However, for a brand-new blog, it's safe to assume you won't have much traffic for at least a year and 50-100 blog posts. If you go with their "Starter" plan, you'll need to add a separate free SSL certificate to show visitors and Google that your site is secure. This is included in their Turbo plan.
I purchased a year of Namecheap hosting for $20.83, but they also are currently offering a free trial on their monthly plans currently starting at $4.88 a month.
I would also recommend Namecheap Easy WP for anyone who just wants to learn how to use WordPress at a very low monthly cost.
Keep in mind that as your blog traffic grows, you will need to migrate your site to a dedicated hosting provider.
Now that I have multiple blogs, I host them all on Bigscoots, and that's who I'd recommend if you don't want to have to worry about migrating your site at some point.
Hosting for a higher-traffic blog
I use BigScoots dedicated hosting for all of my blogs on their "professional" managed WordPress plan. In dedicated hosting, your blog has its own server rather than sharing it with other websites.
I've been very happy with its speed and its amazing customer service. For one site, their managed WordPress hosting starts at $34.95/month, but you can host up to ten at $98.95 per month.
When choosing a dedicated hosting provider, look for one that offers 24-hour customer service chat options, which is vital for any possible website errors. You'll also want your hosting to provide a free SSL certificate, free staging (so you can make edits on a copy of your site that is not live), and nightly backups so you never lose your work.
3. Choose a fast theme
Did you know that slow websites are less likely to rank competitively on Google? Your blog theme sets the design and style of your site, but if it is slow and causes a poor user experience, it will be hurting your chances to monetize your blog.
When I first created my blog, I bought a beautiful and cheap WordPress theme, but it was consistently getting slow speed scores, and it was not optimized for displaying ads.
I switched to the Feast Plugin which includes 6 themes and my pagespeed scores immediately went up 30%! The Feast Plugin is optimized for speed, ads, and regularly updated with SEO best practices.
There are also some FREE themes included in WordPress that are known to be fast and lightweight, like GeneratePress.
A lot of the faster, lightweight themes are less design-oriented, but Google doesn't care about the design of your site. Most likely, your readers don't either. They'd rather have a fast experience with a site that is easy to read.
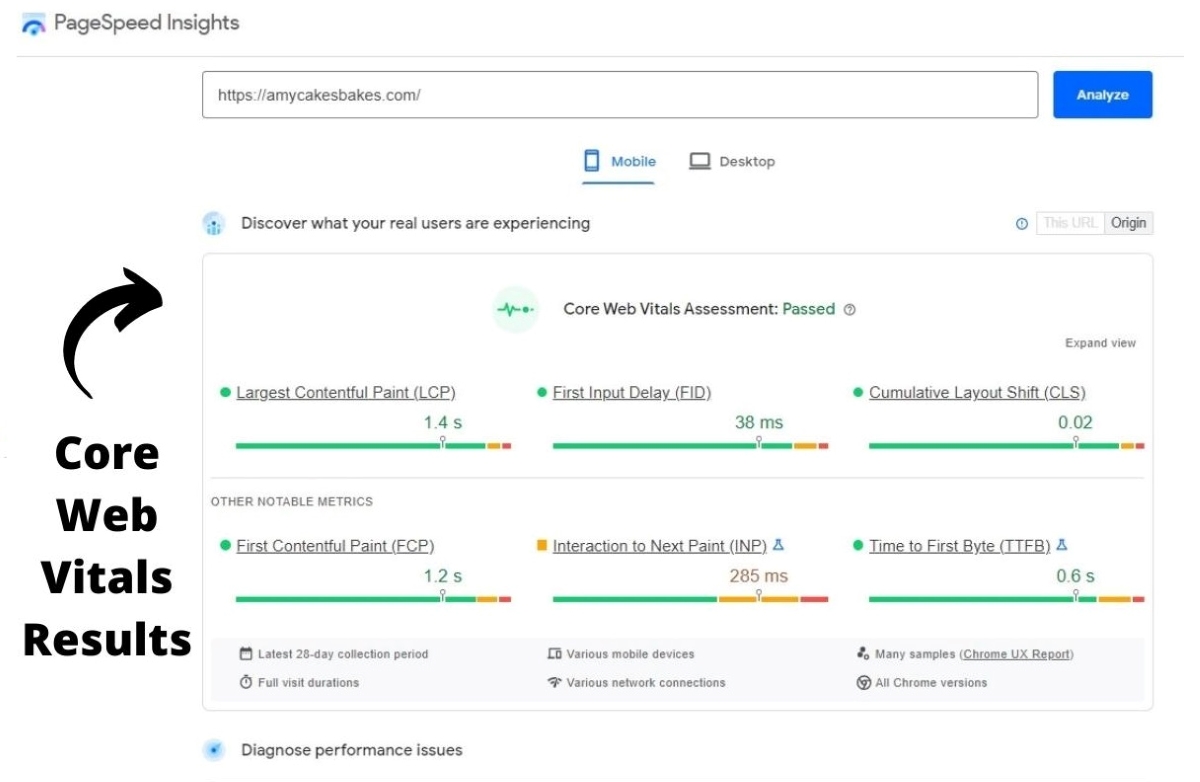
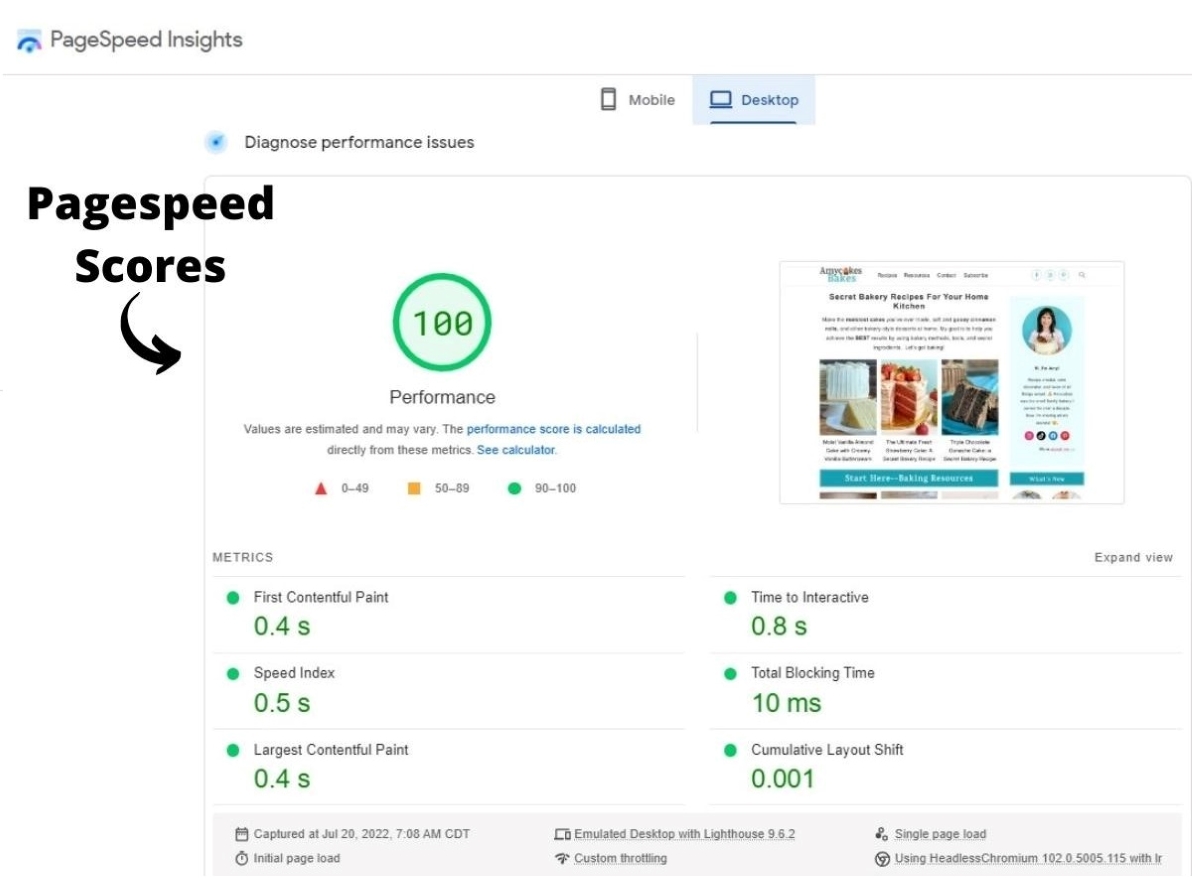
You can test your website speed at Pagespeed Insights, and make sure you're passing all of Google's Core Web Vitals. The Pagespeed Insights results will give you a lot of recommendations to help speed up your site.

For more information on fixing your blog's pagespeed, check out Feast Design Co's Pagespeed Guide.
4. Add essential pages
In order to look professional to Google and future ad companies, you'll need to complete the following pages before you publish your blog. Link to them in the footer of your blog.
- Contact page
- About page
- 3 Legal pages: a Privacy Policy, Terms and Conditions, and Disclaimer or Disclosure page. These pages are important for your audience, but they also help protect you as a blogger. You may be able to find some free templates online. I purchased this Starter Legal Bundle (the templates are written by a lawyer) when it was on sale. I use those templates on both of my blogs.
5. Connect Google Analytics and Google Search Console
It's a good idea to install Google Analytics on your blog right away so you learn about the traffic your site is getting every month. In addition to being an informative tool, most ad companies require that you provide your google analytics reports when you apply.
Here's how to install your Google Analytics code on your WordPress site. You can then use Google Search Console to track which pages are being clicked on in searches, and due to which keywords.
And that's it! Now you're ready to start creating awesome content using the tools below.
📋 Writing, Design, and Organization
Evernote
Evernote lets you write and organize notes on your phone, tablet, or computer. You can then access your writing from any location and preferred device.
I write all my blog posts in the FREE version before uploading them to my blog. You can easily organize notes by category, upload files or screenshots, and share or print your work.
Grammarly
I use the browser extension of Grammarly, a free writing tool. It conveniently catches grammatical errors or typos as I am writing.
Wordtune
Wordtune describes itself as a "writing companion." I use the free version that lets you "tune up" 20 sentences a day.
I'm the queen of run-on sentences, so this has been a big help in my writing. I just copy and paste the run-on sentence, and Wordtune will give me better sentence options of the same content.
Canva
Canva is what I use to create and design Pinterest pins and video thumbnails. There are a lot of free templates to choose from, and it's very user-friendly.
I used the free version of Canva for my first year of blogging, as they offer plenty of free graphics and fonts. I ended up upgrading to their pro version to access all of their photos, graphics, and the ability to easily resize projects.
Clariti
Clariti organizes my blog posts so I can keep track of edits to every post. It connects with your Google Analytics and Google Search Console, so you can see what edits or steps you've taken affect your site's traffic.
This tool is typically recommended after you have a decent amount of blog posts. I started using it when I got to 50 posts as I could not stand the thought of creating spreadsheets to keep track of everything! ☺️
🌐 SEO Tools and Plugins
Keysearch
Keysearch is the most affordable Search Engine Optimization keyword research tool I've found. I use it daily to see which keywords I should be targeting in every blog post.
Rank IQ
Now that I’ve been making an income from my blog, I have been fine-tuning my SEO with RankIQ.
It takes away some of the guesswork when choosing the keywords you include in your posts, which should help your posts rank faster. I've used it for 2 months so far and love it!
RankIQ also connects with your Google Search Console, and I've LOVED having a much easier way to view the ranking and traffic of my blog posts.
WP Rocket
WP Rocket is a speed and caching WordPress plugin that sped up my pagespeed scores to 91% on mobile and 100% on Desktop.

Feast Plugin
I think of the Feast Plugin as the gift that keeps on giving. It comes with 6 themes to choose from, but the best part is it is regularly updated with food bloggers in mind.
You can also use it on non-food blogs. I use it for my second (non-food) blog, as you can currently use the plugin on more than one site for the same price.
Feast frequently updates the plugin with settings that either make my websites better suited for SEO, or make my life easier as a blogger. To me, that's priceless.
📚 Education
Food Blogger Pro
If you're a beginner food blogger, Food Blogger Pro will detail everything you need to get to know in over 80 blogging courses and monthly live Q&As.
I purchased a year's membership and watched or listened for a few minutes every day, but I think you could also dive head first with their quarter membership.

I learned a lot about SEO, social media, and food photography. I also appreciated the helpful forum with other food bloggers and blogging experts.
SEO for Publishers
SEO for Publishers are awesome FREE monthly webinars that provide valuable insight about SEO. They are run by several SEO experts who are well-known in the blogging community.
You can rewatch old episodes or join in on new ones and ask questions live.
The Blogging Millionaire Podcast
I LOVE the Blogging Millionaire Podcast. The host, Brandon Gailey, is also the creator of RankIQ. He offers incredible blogging tips in short, straight-to-the-point podcast episodes.
Food Photography Course
If you're a food blogger, I really loved this Foodie Photography Masterclass course from Udemy. (I recommend purchasing it when Udemy has one of their frequent sales--you can then get courses for around $12-$20.)
📸 Photography and Videography on a Budget
I am an amateur at best, but I love learning about food photography! I currently take all my recipe photos with my iPhone 12 Pro and shoot and edit my recipe videos on my iPad Pro (or my iPhone for overhead shots).
Despite my dreams of owning a DSLR camera, I do not currently have the time to learn that skill. Additionally, a powerful computer or laptop is required to edit 4k videos, so I prefer to shoot and edit videos right on my iPad!

These are the photography and videography tools that I use and love:
- The free version of the Lightroom App (check out The Biteshot's iPhone photography youtube video for tips on how to use it).
- The free version of the VN Video Editor app.
- 2 Tripods--I own this 67" tripod and this 60" tripod. They are affordable but quite sturdy and come with phone attachments.
- this overhead-shot tripod extension that I connect to my taller tripod. I use my iPhone for all overhead shots.
- this tablet mount that I connect to my shorter tripod when I use my iPad for shooting videos.
- these bluetooth shutter remote controls that allow me to take photos and videos without causing my camera to wiggle.
- The splurge: this bright remote-controlled light attached to this softbox on a light stand. I turn off my overhead lights, block out all windows, and use this light only so that I can easily control the lighting. Since switching to this light setup, my photos and videos have become SO much clearer! My previous methods relied heavily on natural light, but only if the sun behaved during the time of the shoot.
I hope you find these blogging tools helpful as you begin your blogging journey! I would be happy to answer any additional questions you may have in the comments below.

Leave a Reply